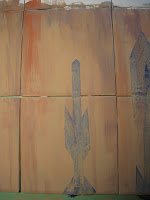
Here is the coffee table after firing. Colors are richer, and look more painterly, which was my goal. The client was happy with the finished look. Now we need to get the table prepped, tiled glued and grouted. That little strip of brown in the middle is the grout color the client picked, and the color of the metal table will be that brown as well.
What'ya think?
Monday, January 30, 2012
Thursday, January 19, 2012
Almost done
Here is the coffee table top, all underglazing done. Taking it to the studio for glazing and firing and should have it back by the end of next week, I hope.
It's always interesting to me to compare the colors before and after they're fired. That blue that you see will be much, much darker. The pale tan will be a rich brown.
At least that's the plan. We'll see!
It's always interesting to me to compare the colors before and after they're fired. That blue that you see will be much, much darker. The pale tan will be a rich brown.
At least that's the plan. We'll see!
Tuesday, January 17, 2012
Which one?
The background color for one of the benches I am making is supposed to be a celadon green as you can see in the bottom photo. I thought, and so did some others I polled, that it looked a little pale and washed out, so I did a second sample with a deeper green. Which one do you like?
Monday, January 16, 2012
How did the taping work out?
Coffee table, part two:
I had decided to tape over the arrows that I had painted, so that I could do and evenly flowing background, while saving the work that I had already done.
Why not just redo them after, you may ask? Welllll..... if you add too many layers of underglaze, you lose your original shade and end up with dark mud. Not pretty, I guarantee it.
So I taped it, brushed on the underglaze over the taped area, then removed the tape, and.....
Voila! As you can see, from the photos below, it worked! I'm a happy girl. Now all it needs is a little touch up and we're good.
Wednesday, January 11, 2012
Sneak Peek
Here's is Ted's excellent rendering of one of the benches I'm working on for Chandler Center for the Arts. The other one is just below.
I figure each tile has taken me about an hour to do, with all the steps the process itself takes.
Explains the 6 days a week I've been spending at the studio. Trying to get the first steps, making the tiles, done before all the students get back.
I figure each tile has taken me about an hour to do, with all the steps the process itself takes.
Explains the 6 days a week I've been spending at the studio. Trying to get the first steps, making the tiles, done before all the students get back.
Monday, January 9, 2012
Approved design, first pass
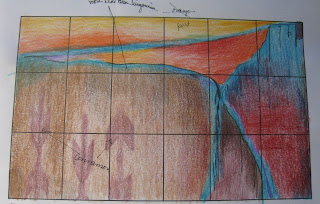
I'm so proud of my client. She went out of her comfort zone and picked more of an abstract scene. It's in desert canyon colors. The drawing I sent to her was in pencil, so we've made some color changes and we're ready to go.
Here is the first pass. I've painted the arrows in, and will cover them with painter's tape so I can then paint the background over them. Hopefully the paint won't come with the tape when I remove it after the background is complete.
Here is the first pass. I've painted the arrows in, and will cover them with painter's tape so I can then paint the background over them. Hopefully the paint won't come with the tape when I remove it after the background is complete.
Friday, January 6, 2012
Documenting progress
OK, now this may not look like much, but I've laid out the tiles for my initial drawing.
Checked each for blemishes.
Wrote tile number, my signature and direction arrow for finished tile on the back of each one, so assembly is easy when they're done.
Received my new underglazes and the table in the mail.
Laid out color diagram of finished work, written instructions from the client, and photos of the room the finished piece will occupy.
NOW, I'm ready!
Wednesday, January 4, 2012
Happy New Year All
It's a new year, with new stuff to do and old stuff to complete.
Still working on the Chandler Center for the Arts Tile project. Had a kiln catastrophe which put me back a bit, but I'm slowly getting back to where I was, thank goodness.
Remember I told you I was going to try a high-fire yellow? Well, it worked! These altars were for a client who picked them up right after Christmas. The yellow is Hobby, Colorobbia, Sunburst, and it's an underglaze. Kind of a limey yellow, but at least it's a yellow, right?
Starting to work on a client's coffee table, and have a new commission: an altar with a "cat" theme. I'll let you know what I come up with.
Subscribe to:
Comments (Atom)


